


I like how a few simple shapes can turn into a little clay object with its own personality.
For these mini projects, I’ve gathered ideas that keep the forms approachable while leaving room to play with color and small details.
Some are sweet little decorations, while others can be made into charms or keepsakes.
Here are 18 beginner-friendly ideas to try when you’re in the mood to make something small by hand.
Hand-Shaped Clay Trinket Dishes
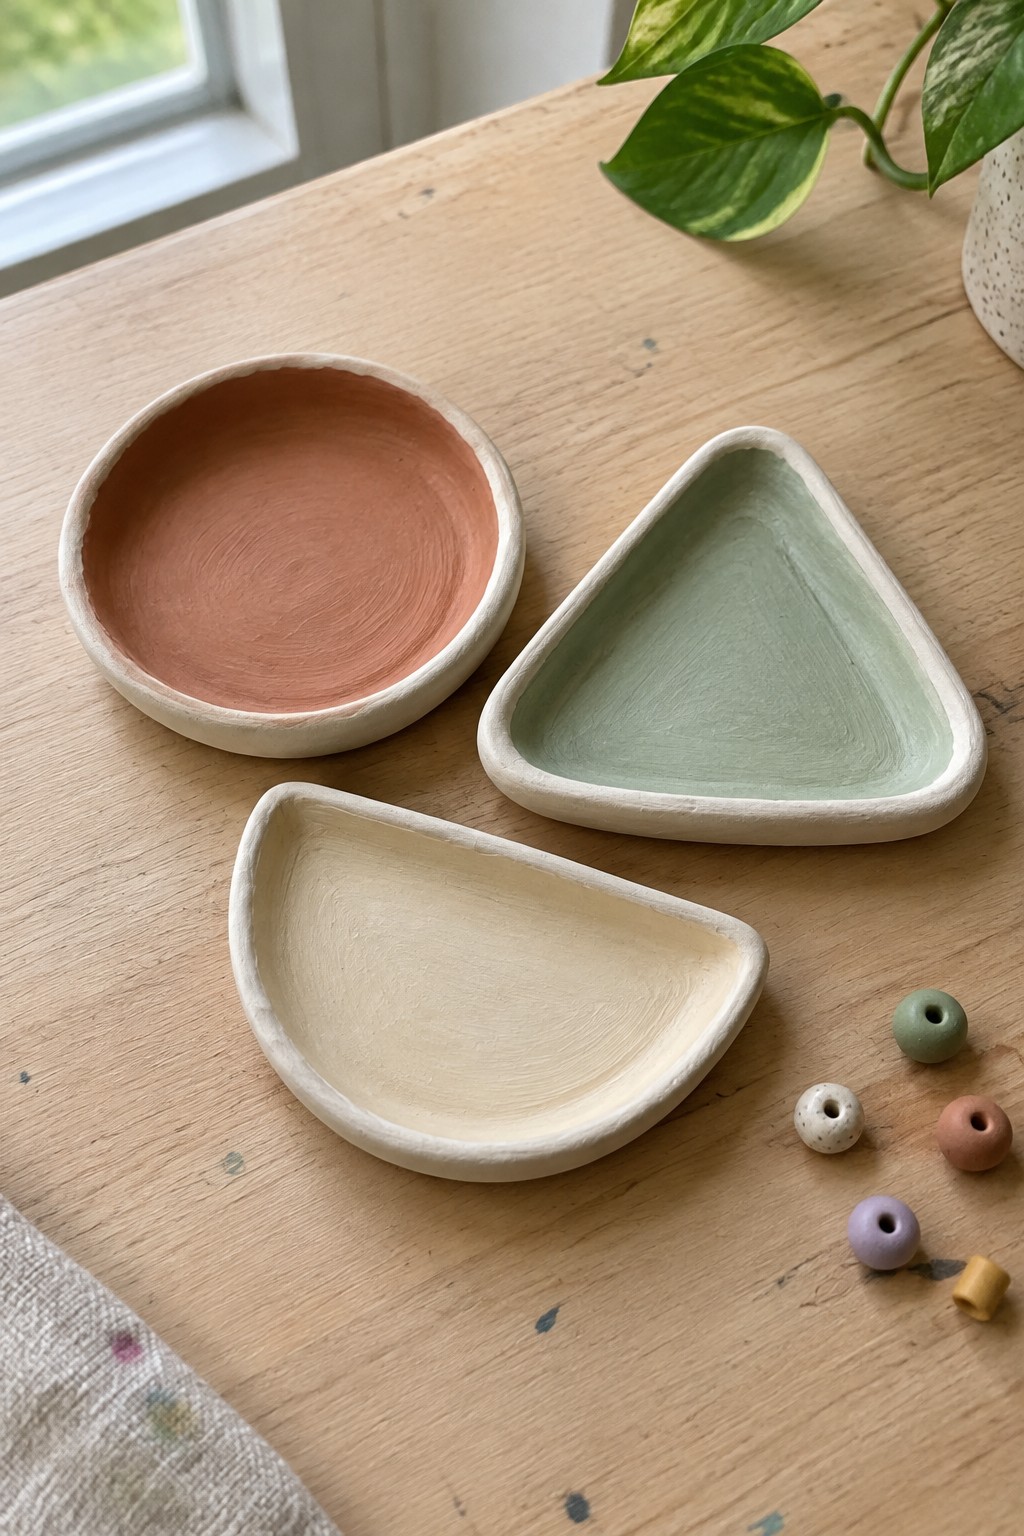
These small clay trinket dishes use simple round and rounded triangular shapes, with raised, irregular rims and soft terracotta, sage green, and cream interiors. Their hand-sculpted contours keep the pieces visually distinct while making them suitable as decorative catchalls for small items.
The basic shapes are easy to adapt: try a leaf-like outline, a softer triangle, or a few different sizes, and change the interior colors to suit your palette. A beginner could keep the forms simple and focus on shaping the rims, making a coordinated set or a single decorative dish to hold jewelry or other small objects.
Clay Fruit Keychain Charms

Hand-sculpted strawberry, lemon-slice, and cherry charms turn simple fruit shapes into colorful keychain decorations. Their bright red, yellow, and green details make each small piece easy to recognize, while the handmade contours keep the set from looking uniform.
The fruit motifs can be simplified into basic rounded forms with a few contrasting details, making them easy to adapt across different sizes and color combinations. Use one fruit as a single charm or combine several for a playful keychain or bag accessory.
Sleeping Gray Cat Clay Figurine

A curled cat clay figurine uses simple rounded forms to shape its body, tucked tail, and pointed ears. Small painted facial marks and whisker dots give the handmade sculpture its character without adding many details, making it a compact animal craft for display.
The rounded silhouette is a useful starting point for adapting the idea: simplify the face for an easier version, or change the pose, ear shape, and paint colors to create a different cat. It could be made in several sizes as a decorative miniature or a handmade gift, with the curled form keeping the design recognizable even when the details are minimal.
Miniature Clay Bakery Magnet Set
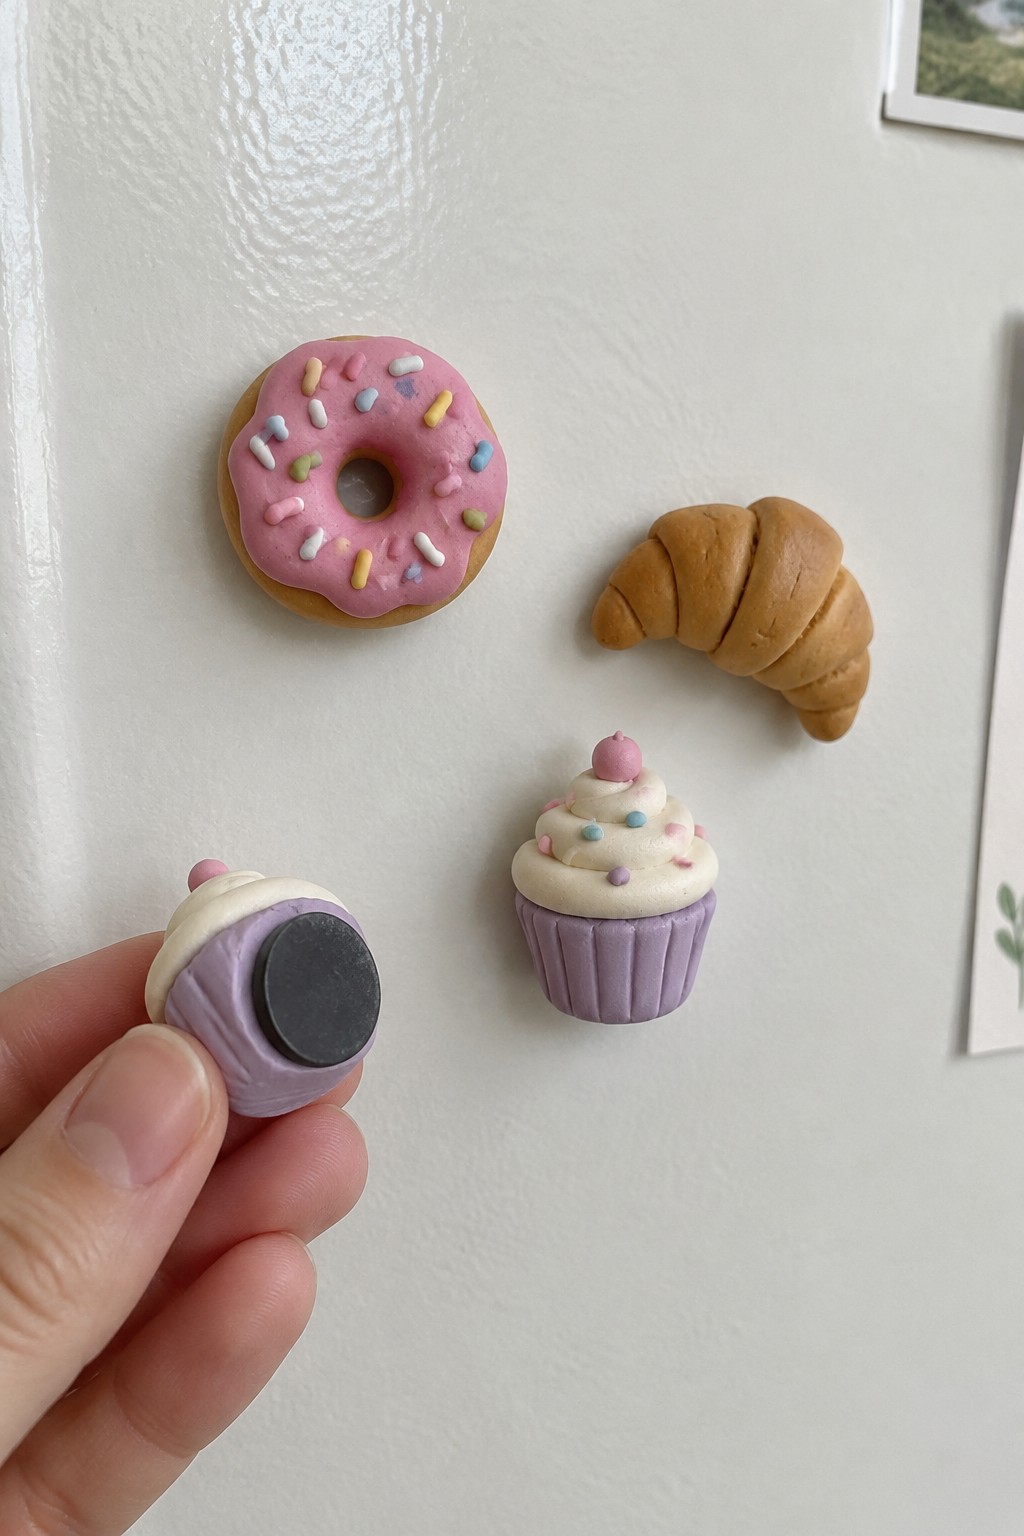
A miniature clay bakery set pairs a sprinkled pink doughnut, a sculpted croissant, and a lavender cupcake with piped-looking frosting. The small hand-formed pastries use familiar shapes and contrasting colors to create a playful collection of decorative magnets, with one piece held to reveal its flat magnetic back.
The recognizable pastry shapes make this idea easy to adapt: simplify the frosting and sprinkles, or add other miniature treats in a matching palette. Make individual magnets or a coordinated set, and change the colors and toppings to create a different bakery theme or a small handmade gift.
Clay Moon and Star Hanging Ornament

A hand-sculpted clay wall ornament combines a deep blue crescent moon with two simple five-pointed stars in warm yellow and ivory. Their small scale, handmade contours, and contrasting colors make the hanging arrangement a clear decorative motif rather than a functional object.
The crescent and stars are simple shapes to adapt, so a beginner could make a pared-down version with one moon and a single star, or create a longer hanging with extra shapes. Try different color combinations or vary the size of the pieces to suit a bedroom, craft space, or seasonal display.
Colorful Hand-Shaped Clay Bead Necklace

This handmade clay necklace pairs rounded beads with larger, flat circular beads decorated in coral, teal, and mustard stripes. The mix of simple shapes, varied sizes, and repeated colors gives the piece a bold, balanced look, making it a decorative clay jewelry project.
The repeated bead shapes make the design easy to adapt: a simpler version could use fewer beads and plain colors, while stripes or color-blocked details can make each larger bead distinct. Try a different palette or make matching earrings or a bracelet with the same shapes and colors.
Hand-Painted Striped Clay Planters

These hand-shaped clay planters use simple rounded forms and broad painted stripes to create a coordinated set of decorative plant pots. Cream and terracotta stripes contrast with an olive-green pot, while the uneven contours keep the designs visibly handmade. The idea fits the functional decorative accessory category, though the pots are best treated as decorative unless their material and finish are suitable for planting directly.
The bold stripes are easy to adapt with a limited palette, and beginners could keep the shapes simple while varying the band widths or switching to dots and checks. Make the pots in different sizes for a matching collection, or use the same painted pattern on small clay containers intended for holding craft supplies or other dry items.
Rainbow Clay Drop Earrings

These handmade clay earrings use a layered rainbow silhouette, with curved bands of pink, mustard yellow, and pale blue forming each arch. Their simple geometric shape and soft color contrast make them a distinctive piece of clay jewelry without needing extra painted details.
The repeated arches make the design easy to adapt: simplify it to two colors, change the palette, or make smaller versions for a different look. The same rainbow shape could also become a hanging ornament or decorative charm, while the earrings make a colorful handmade gift.
Hand-Sculpted Clay Mushroom Miniatures

These small clay mushroom sculptures use simple cap-and-stem shapes to create a coordinated set of decorative miniatures. Different cap silhouettes, earthy colors, pale spots, and visible gill details give each one a distinct look while keeping the design easy to recognize.
The cap is the main feature to adapt: try rounded or pointed shapes, change the colors, or add spots and short lines for gills. Making a few mushrooms in different sizes could create a small display, while a simpler beginner version could use one cap color and just a few painted details.
Tiny Clay Cottage

A miniature clay cottage uses a rounded body and overlapping coral roof pieces to create the look of a small fairytale house. Teal shutters, crossbar windows, and a grooved wooden-look door provide clear details at a compact scale, making it a decorative clay sculpture built from simple shapes.
The roof’s repeated rounded pieces make the design recognizable, while the windows and door give you room to personalize each cottage with different colors or small details. For a simpler version, use a plain rounded roof and add just one door and a pair of windows; making cottages in different sizes could also create a small display set.
Yellow Spotted Clay Ring Holder
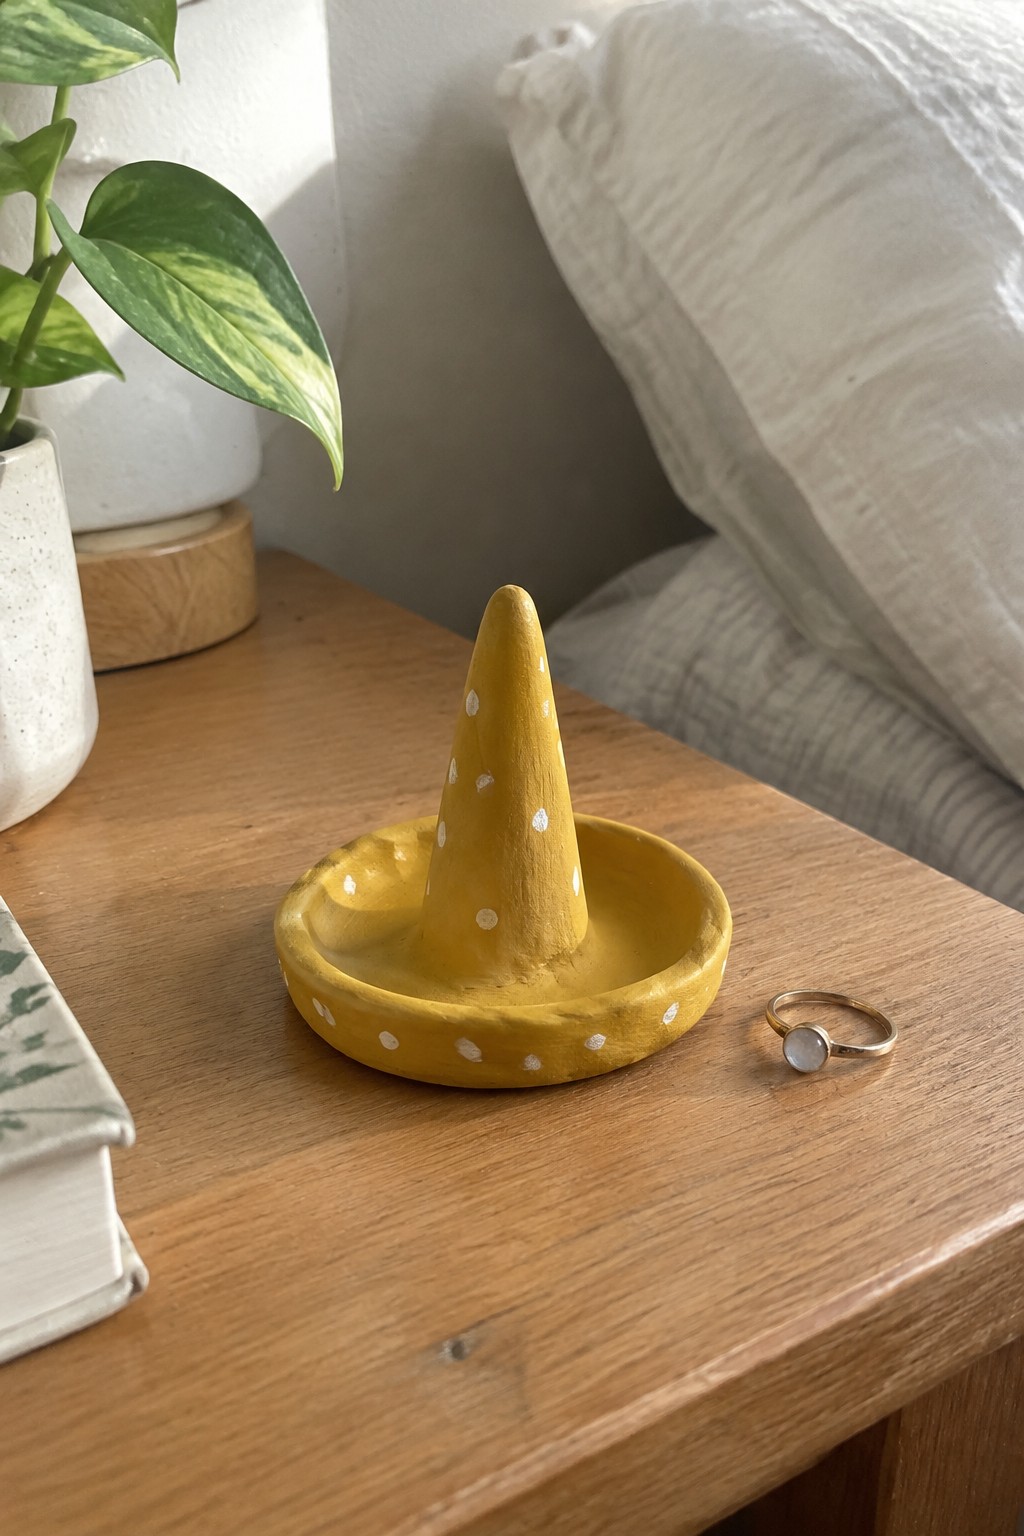
A hand-sculpted clay ring holder pairs a shallow round dish with a tall, tapered cone for keeping rings together between wears. Its mustard-yellow finish and simple white dots make the sculpted shape easy to notice without adding complicated details, so it fits both decorative clay crafts and useful jewelry accessories.
The cone and dish can be shaped from basic forms, and a beginner could keep the surface plain or use a few painted dots instead of covering the whole piece. Try different colors or dot patterns, or make a smaller version for a single ring; the same design also works as a small decorative stand for other lightweight jewelry.
Clay Sun, Cloud, and Rocket Pencil Toppers

These hand-sculpted clay pencil toppers turn three simple motifs into decorative accessories: a smiling sun, a cloud, and a small rocket with a flame. Their bright colors, rounded shapes, and small facial details make each topper easy to recognize while keeping the set visually consistent.
A beginner could simplify the faces and use fewer sculpted pieces, then adapt the same idea with stars, moons, or flowers. Making the toppers in different colors or sizes gives you a playful handmade set, or lets you focus on just one motif as a small gift or desk accessory.
Hand-Painted Clay Leaf Plaques

These handmade clay plaques use simple square and round shapes as small wall decorations, with raised leaf forms and pebble-like details set against a softly textured surface. Muted blue, beige, and gray paint gives the botanical designs a coordinated look while keeping the sculpted contours visible.
The leaf motif can be adapted with different branches, colors, or plaque shapes, and a simpler version could use one large leaf and just a few rounded accents. Make the plaques in different sizes for a small grouping, or keep one as a decorative piece for a shelf or wall.
Miniature Clay Sushi Pieces

These hand-sculpted clay miniatures recreate three types of sushi: a salmon nigiri, a yellow tamago-style piece, and a black seaweed-wrapped roll with colorful filling. Their compact shapes and contrasting colors make them easy to recognize as a small decorative food set, with the roll’s visible filling adding extra detail.
The simple forms can be adapted by changing the toppings or filling colors, or by making just one piece for a smaller project. A beginner could start with the round roll and a few colored sections, then try the layered nigiri shapes; the finished miniatures could be displayed as a small collection or turned into decorative charms.
Abstract Arch Clay Sculpture

This small clay sculpture pairs a terracotta-colored oval base with a gray rounded form and a cream arch resting over it. Its simple stacked shapes and muted color contrast make it a decorative miniature sculpture rather than a functional holder.
The design is easy to adapt by changing the arch’s curve, the base shape, or the colors while keeping the forms simple. A smaller version could become a shelf ornament, while a wider arch or different arrangement of rounded shapes could create a distinct sculptural piece.
Miniature Clay Planet Charms

These small handmade clay charms turn simple spheres into miniature planets, using a raised gold-colored ring and contrasting painted surface details to make each design distinct. Their rounded shapes and compact scale suit them as decorative jewelry or bag charms.
The planet motif is easy to adapt by changing the colors, adding dots or bands, or making a ringed version alongside a plain, speckled planet. A beginner could keep the forms simple and make a matching set in different sizes for gifts or personal accessories.
Hand-Sculpted Clay Flower Bouquet

A small clay flower bouquet combines sculpted blooms and leaves in a rounded vase to create a decorative floral craft. The simple petal shapes, raised centers, and mix of coral, yellow, white, and green give the handmade arrangement color and dimension without relying on intricate patterns.
The repeated flower shapes make the idea easy to adapt: a simpler version could use fewer blooms and plain centers, while different colors or petal shapes would change the look. Make the bouquet in a smaller scale for a shelf accent or create larger flowers with varied stems for a more prominent display.
Miniature Clay House Keychains

Hand-sculpted miniature houses turn a simple cottage shape into decorative keychain charms. Their small windows, doors, chimneys, and individually shaped roof tiles create a clear house motif, while contrasting colors help each design stand out as a tiny clay sculpture.
The basic box-and-roof shape is easy to adapt with different door and window layouts, roof colors, or small details such as shutters. Simplify the design by using flat roof sections and just a few painted features, or make several houses in different color combinations for a coordinated set of keychains.
Frequently Asked Questions
For most beginner projects, you only need air-dry clay or polymer clay, a smooth work surface, and a few basic tools. A rolling pin or smooth glass helps flatten the clay, while a craft knife, toothpick, or straw can cut shapes and add details. Keep a little water nearby for smoothing air-dry clay, and use acrylic paint and a suitable sealer if you want to finish your pieces.
Air-dry clay is a good choice if you want to avoid baking. It hardens over time, though the drying period varies by thickness and brand. Polymer clay stays soft until you bake it according to the package directions, which can make it easier to work on small details. Choose based on the tools and finishing steps you prefer, and always follow the manufacturer’s instructions.
Start with basic forms such as balls, coils, flattened circles, triangles, and cubes. A ball can become a tiny fruit, animal head, or bead; a flattened circle can become a magnet or mini dish; and a few coils can form a small flower or heart. Combining two or three shapes is often enough to create a recognizable design.
Condition the clay by kneading it until it feels pliable, then build pieces with an even thickness. Avoid adding too much water to air-dry clay, since excess moisture can contribute to cracking. Let pieces dry slowly on a flat surface, turning them occasionally if the instructions allow. For polymer clay, avoid stretching thin parts and bake the finished piece exactly as directed.
Add texture before the clay hardens using a toothpick, the end of a paintbrush, or a household object with an interesting pattern. Once the piece is fully dry or baked and cool, you can paint it with acrylics and apply a compatible sealer if desired. Keep tiny projects decorative unless the clay and finish are specifically labeled as safe for food or regular skin contact.
