


I like making small clay figures for Halloween because a few simple shapes can turn into fun little characters.
For this collection, I’ve gathered ideas for spooky miniatures like ghosts, pumpkins, and other seasonal favorites.
I enjoy how little details and color choices can give each figure its own personality.
These 19 ideas offer plenty of inspiration for adding handmade Halloween decorations to your home.
Miniature Ghost Family in Witch Hats

This hand-sculpted clay miniature features three simple ghost figurines, with two wearing black and purple witch hats and one carrying a tiny broom. Rounded bodies, scalloped lower edges, and small painted faces give the group a clear character without needing many details. It fits neatly into the category of seasonal decorative sculptures.
The simple ghost shapes make the concept easy to adapt: vary the heights, hat colors, or expressions, or give one figure a different small accessory. A beginner could make a single ghost with a hat and painted face, while a set of different-sized figures could make a memorable Halloween gift or display.
Jack-O’-Lantern Clay Trinket Dish
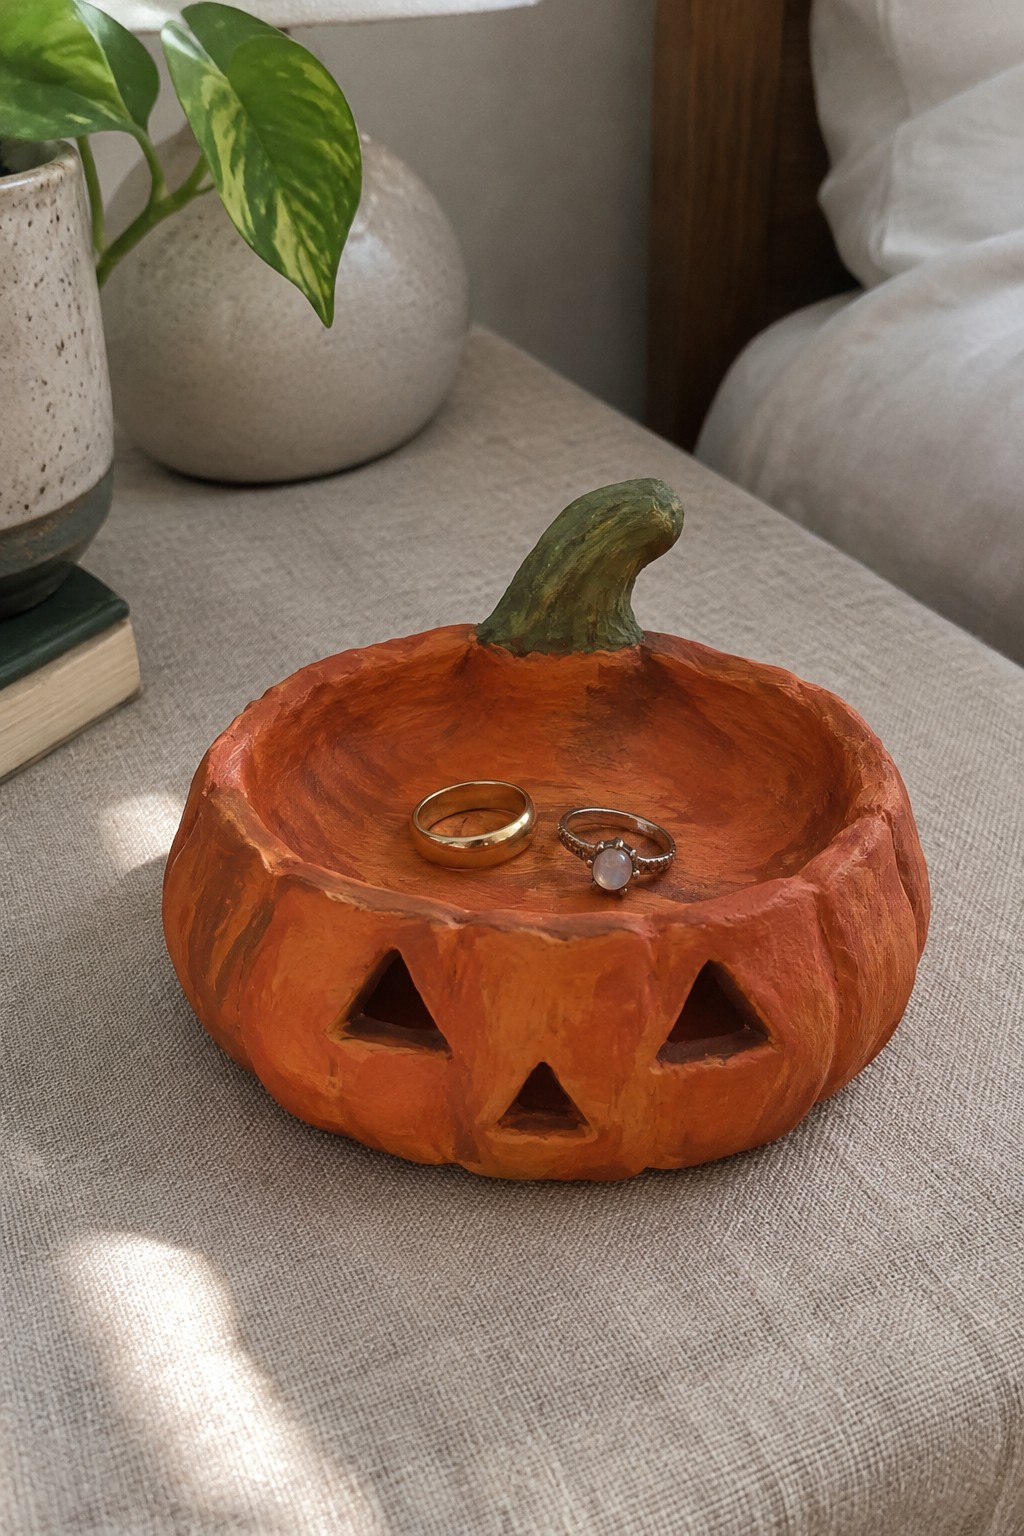
A hand-sculpted jack-o’-lantern dish turns a familiar Halloween face into a small decorative holder. Its irregular orange contours and raised green stem keep the pumpkin shape easy to recognize, while the triangular cutouts give it a carved look; two rings show how it can hold small accessories.
The pumpkin silhouette makes the idea memorable, and the face can be adapted with different expressions, stem shapes, or autumn colors. For a simpler version, use a plain shallow pumpkin-shaped dish and paint on the features instead of shaping cutouts; a smaller version could also work as a decorative ring dish or seasonal gift.
Winged Bat Clay Charms

These hand-sculpted clay bats have spread wings, pointed ears, small fangs, and shiny eyes, with dark bodies set against muted purple wing details. Their compact, flat-backed form and attached metal loops make them Halloween character charms that can be used as keychains or hanging decorations.
The wing shapes and facial details make the bats recognizable, while the dark-and-purple palette keeps the design suited to Halloween. For a simpler version, use a basic bat silhouette and add just the ears, eyes, and fangs; you could also change the wing color or make the bats in different sizes for a set of charms.
Moonlit Clay Graveyard Plaque

This hand-sculpted clay wall decoration turns a graveyard scene into a compact Halloween plaque, with a full moon, three carved-looking headstones, a bare tree, and a curled black cat. Muted gray, ochre, and green tones tie the raised details together, while the uneven contours give the scene a textured, handmade look.
The plaque is memorable because the simple silhouettes make the graveyard easy to read, even with several details in one small scene. You could simplify it to a moon, one tombstone, and a cat, or change the headstone markings and add small bats or pumpkins; a smaller version could also work as a seasonal ornament.
Seated Clay Witch With a Broom
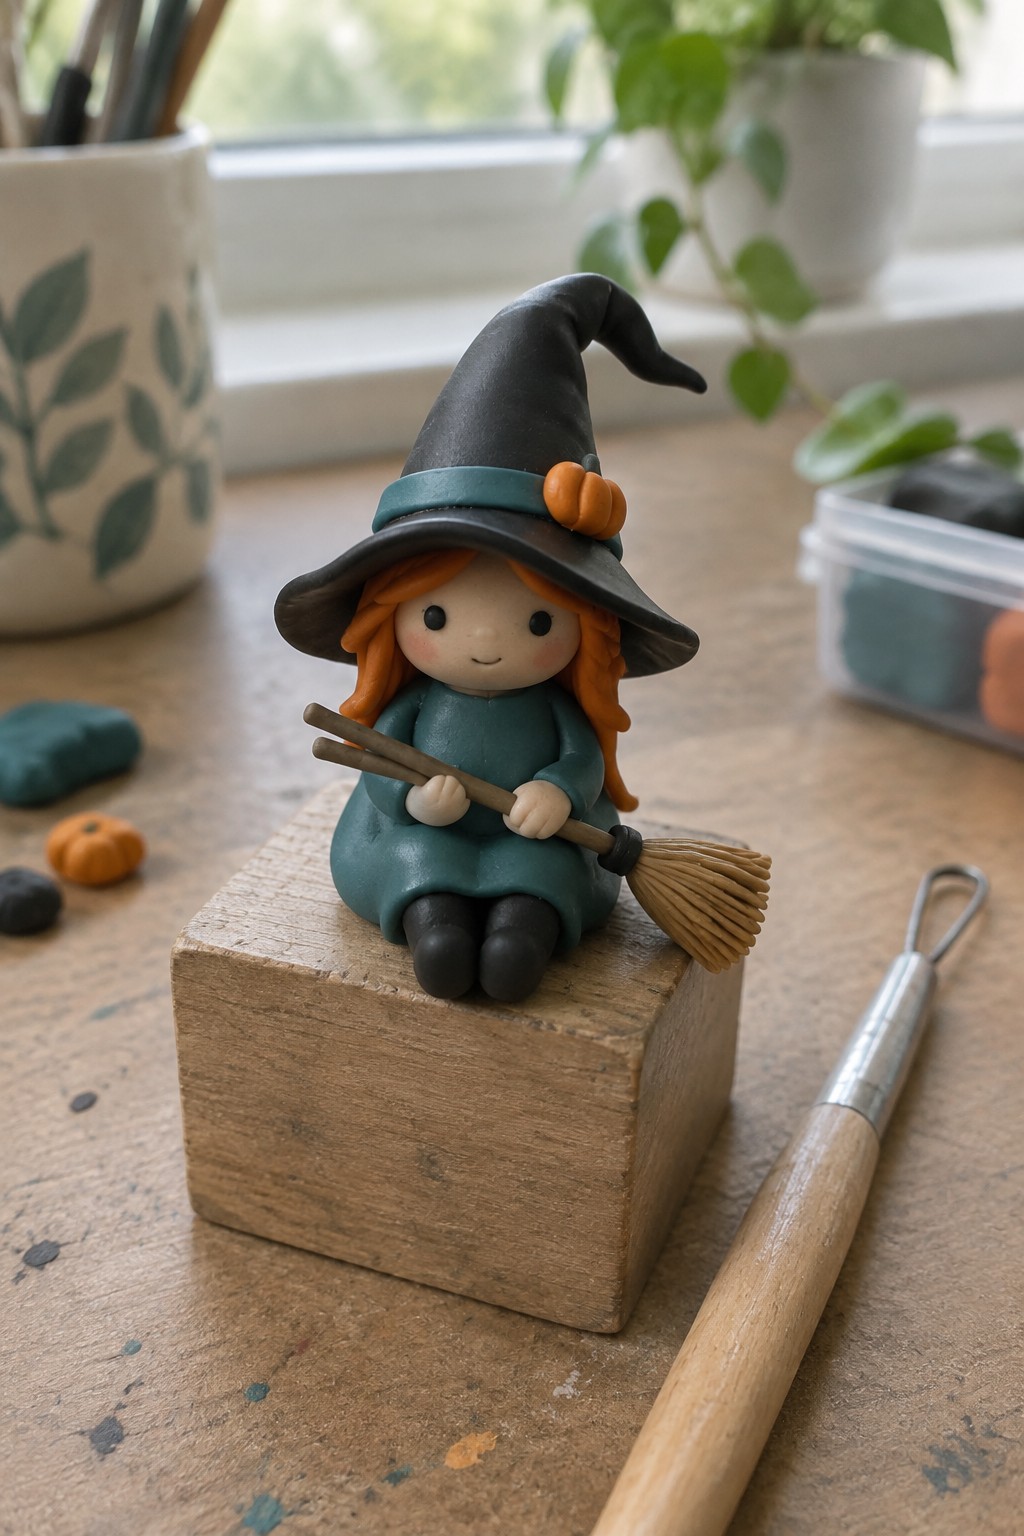
This hand-sculpted clay figurine features a seated witch holding a miniature broom, with orange hair, a teal dress and hatband, and a floppy charcoal hat topped with a small pumpkin. Its rounded proportions and contrasting colors make the character easy to read at a small scale, while the broom adds a clear seasonal detail. It fits naturally among decorative Halloween miniature sculptures.
The hat, dress, and broom provide simple shapes to adapt with different colors or small seasonal accents, such as a star or leaf. A beginner could simplify the face and outfit while keeping the seated pose and broom, or make the figure larger as a display piece rather than a tiny collectible.
Mini Ghosts on Colorful Clay Pumpkins

These small hand-sculpted clay pumpkins feature ghost faces painted onto their fronts, turning simple seasonal decorations into miniature Halloween characters. Their rounded, ridged shapes and contrasting orange, cream, and sage-green colors make the pale ghosts easy to pick out, while the short stems finish each pumpkin silhouette.
The basic design is easy to adapt by changing the pumpkin colors, ghost expressions, or sizes, or by adding details such as tiny bats or stars. Keep the face shapes and features simple for a smaller project, or make a set with different expressions for a decorative display or handmade Halloween gift.
Skull Earrings With Heart-Shaped Eyes

These small hand-sculpted clay skulls are a pair of decorative earrings, with dark heart-shaped eye sockets and tiny nose and teeth details contrasting against the pale skulls. Their rounded contours and copper-colored earring backs make the spooky character design easy to recognize at a small scale.
The heart-shaped eyes give the classic skull motif a distinctive twist, while the simple color palette keeps the details clear. You could adapt the idea into a smaller pair of earrings, make a single skull charm, or change the eye shapes and add painted accents for a different Halloween look.
Haunted House Clay Wall Ornament
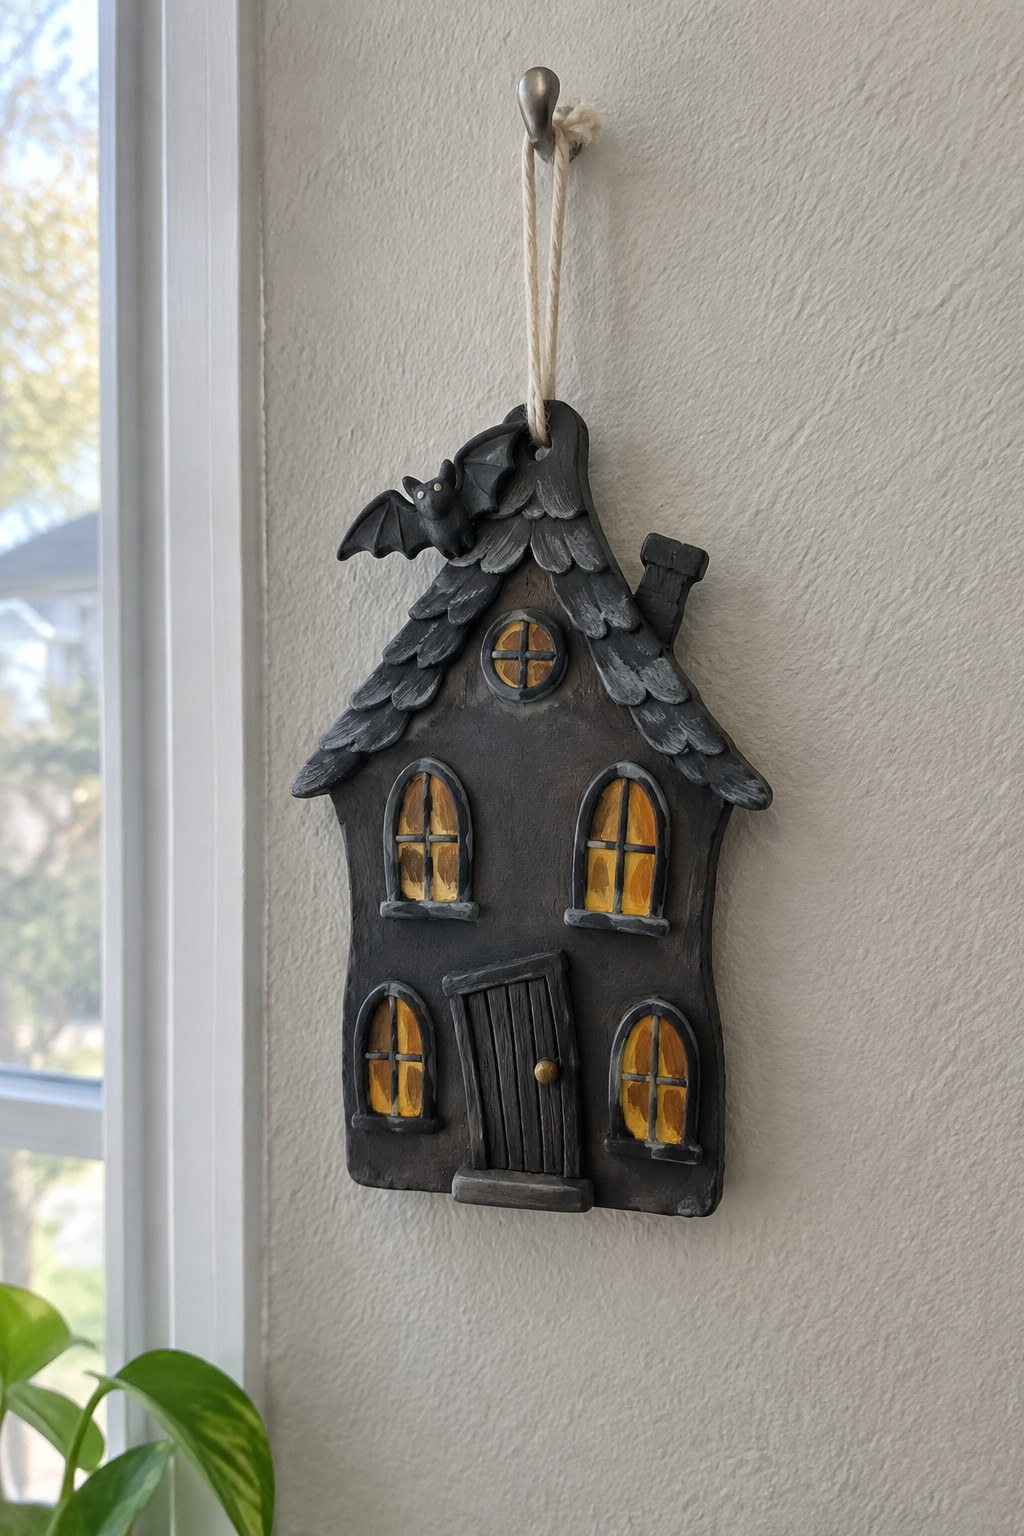
A hand-sculpted haunted house makes a detailed Halloween wall decoration, with a steep shingled roof, crooked door, glowing painted windows, and a small bat perched near the top. The dark finish and warm yellow-orange window details create a clear spooky-house concept without relying on a large size.
The layered roof and small windows make the design memorable, but a simpler version could use a plain house silhouette with just a few painted windows and a bat detail. Change the roof shape, window colors, or attached Halloween character to create a matching set of hanging decorations or a personalized seasonal gift.
Seated Skeleton Cat Figurine
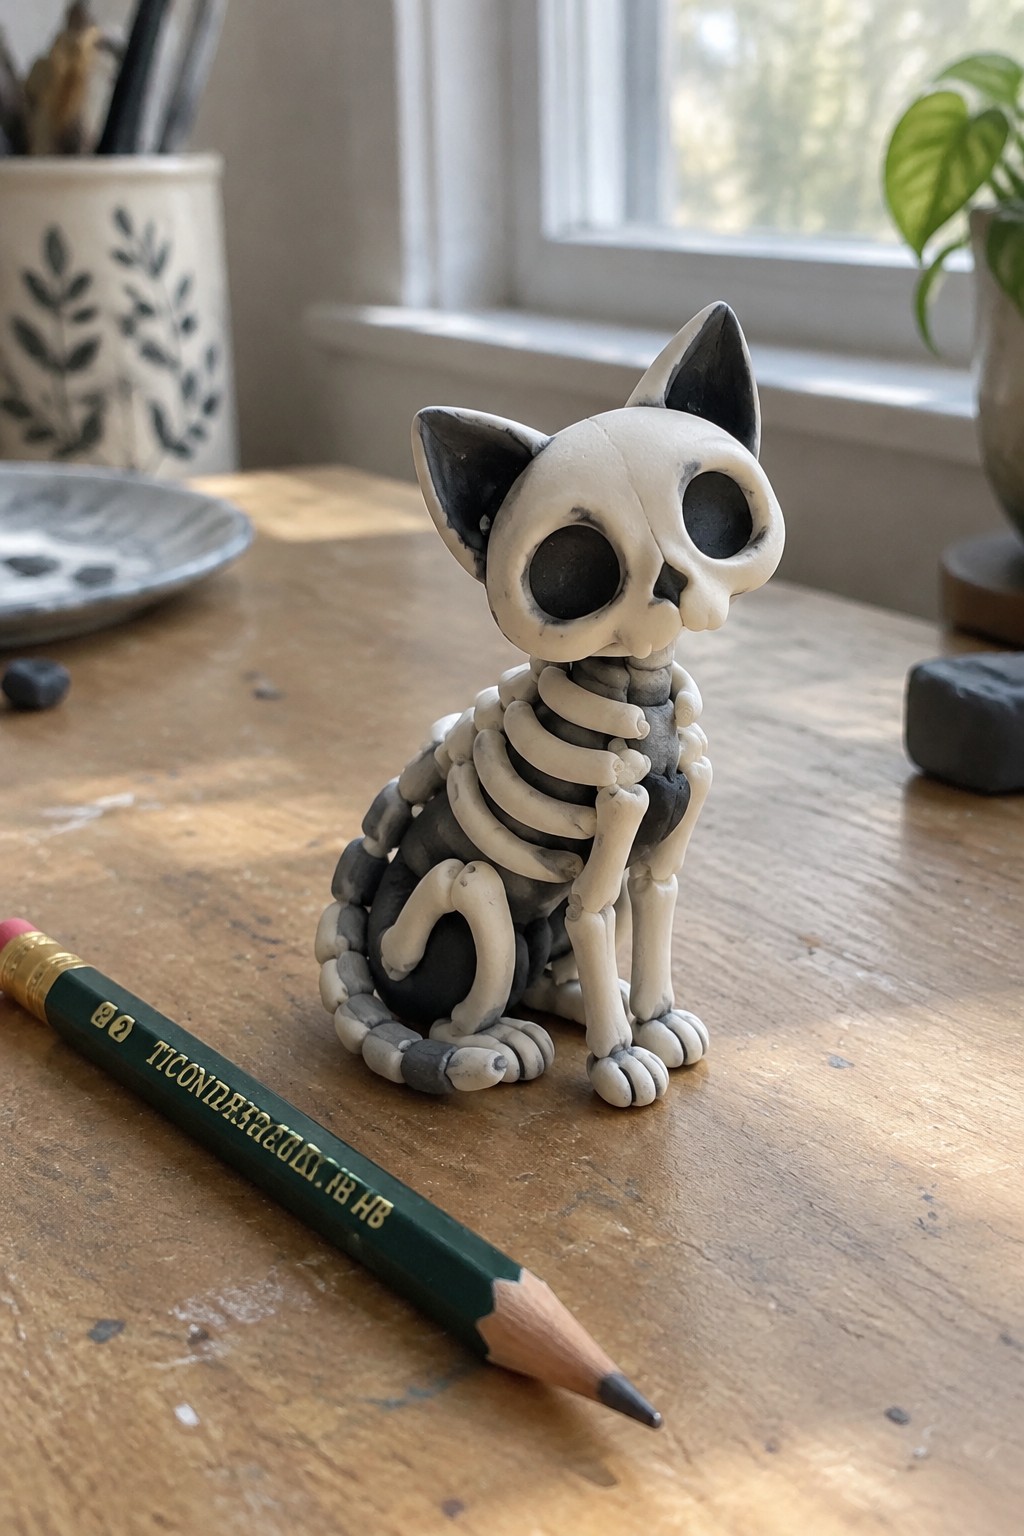
A hand-sculpted clay cat reimagines a familiar animal as a small skeleton figurine, with oversized dark eyes, pointed ears, and raised bone shapes layered over a charcoal-colored body. The contrast between the pale skull and ribs and the dark details makes the Halloween theme clear, while the seated pose gives the miniature sculpture a stable, recognizable silhouette.
The layered bones are the design’s most memorable feature, and you could simplify them into a few curved ribs and a skull-like face for a smaller project. Try different ear shapes or add a tiny collar to make a series of skeleton animals, or change the colors while keeping the dark body and light bone details for contrast.
Small Sculpted Ghost Clay Magnets
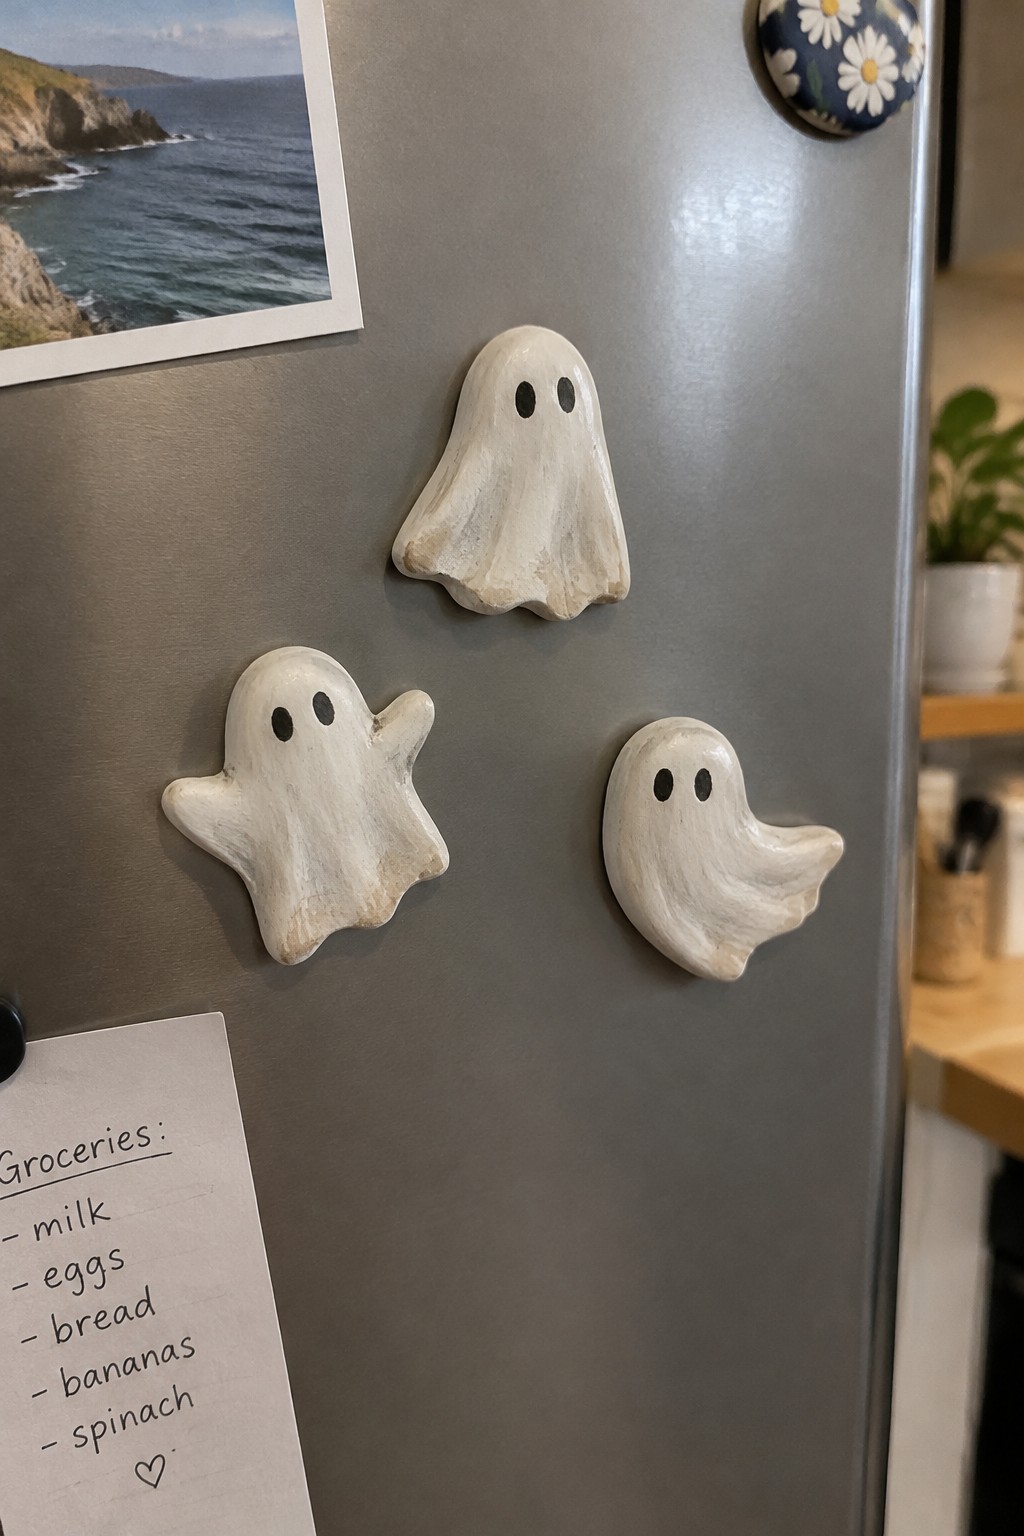
These handmade clay ghost magnets use simple draped silhouettes and painted black eyes to create a small set of spooky seasonal decorations. Their uneven, hand-shaped contours give each ghost a slightly different outline, while the plain white surfaces keep the features easy to see.
The simple shapes make the idea easy to adapt: try different eye shapes, add tiny painted cheeks, or make the ghosts in varied sizes for a refrigerator display. Keep the forms rounded and the details minimal for a simpler version, or give each figure a distinct pose to make a more varied set.
Miniature Witch Potion Bottle Charms

These miniature clay charms take the shape of potion bottles, with rounded bodies, cork-like tops, and small metal loops for hanging. Green, purple, and amber colors distinguish the bottles, while simple leaf, moon, and sun labels make each one read as a different witchy potion. They fit the Halloween clay charm category and could be used as small bag or key accessories.
The bottle shape is easy to vary with different silhouettes, colors, and painted labels, so a set can feel coordinated without making every charm identical. For a simpler version, use one bottle shape and a single painted symbol, or make larger versions as hanging decorations. The bright labels and distinct colors make the idea easy to spot and save for a Halloween craft project.
Sleeping Black Cat in a Miniature Clay Graveyard

A curled black clay cat is the focal figure in this miniature Halloween graveyard scene, surrounded by small tombstones, a bare tree, fallen leaves, a crescent moon, and a low fence. The contrast between the dark cat and the earthy gray, brown, and orange details makes the hand-sculpted clay scene easy to read at a small scale, fitting both miniature sculpture and seasonal decoration.
The graveyard concept can be adapted by changing the cat’s pose, adding a tiny ghost or pumpkin, or using different leaf colors while keeping the tombstones and fence as the setting. For a simpler version, make the cat and just one or two graveyard details on a small base; the finished miniature can sit on a shelf or join a collection of Halloween clay scenes.
Candy Corn Clay Figurines

These hand-sculpted clay figurines turn the familiar candy corn shape into three small characters, with white tips, orange centers, yellow bases, painted faces, and simple sculpted arms and feet. Their different expressions and poses make them read as a coordinated set of Halloween miniature sculptures rather than pieces of candy.
The three-part color pattern gives each figure a clear, easy-to-follow shape, while the faces and small accessories offer room to personalize the set. For a simpler version, keep the same rounded silhouette and painted bands but use basic eyes and mouths; you could also make single figures in different sizes or vary the expressions and poses.
Witch Hat Clay Pencil Topper
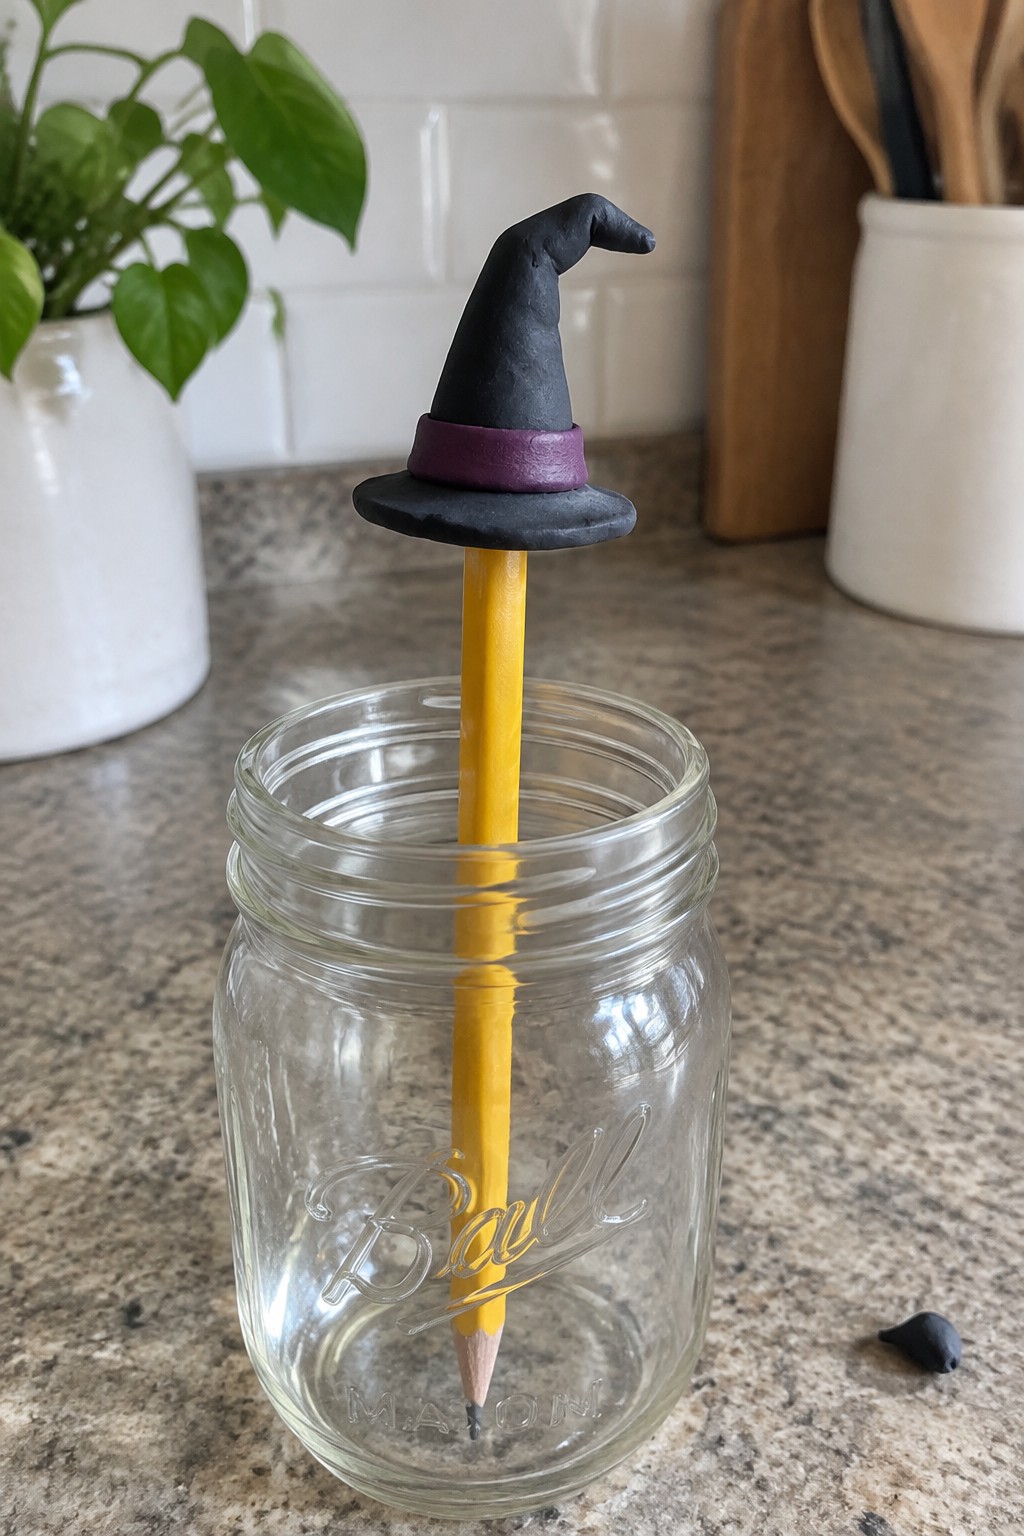
A hand-sculpted witch hat turns an ordinary pencil into a small Halloween accessory, with a bent black crown, a purple band, and a wide brim. Its simple silhouette and contrasting colors make the miniature clay decoration recognizable without needing extra details.
The pencil-topper idea is easy to adapt by changing the hat’s shape, band color, or scale, or by adding a small clay buckle or star. A beginner could simplify the bent crown and keep the brim and band as basic shapes, while a larger version could become a decorative seasonal accent rather than a pencil accessory.
Black Cat Curled Around a Golden Crescent Moon

This miniature clay ornament pairs a seated black cat with a curved gold crescent, with a small hanging loop at the top. The cat’s textured body and curled tail add detail to the simple silhouette, while the dark-and-gold contrast makes the design easy to read at a small scale.
The crescent shape gives the cat a natural place to sit, so a simpler version could use a smooth body and just a few marks for fur texture. Try changing the moon to silver or adding tiny stars, or make the cat in another color; the finished piece could be displayed as a seasonal hanging decoration or kept as a small collectible figurine.
Miniature Clay Tombstone Garland

A clay tombstone garland pairs small grave-marker shapes with simple spooky details, including “RIP” lettering, a cross, a skull, and a branch motif. The varied silhouettes and weathered gray finish make these hand-sculpted pieces read as tiny Halloween grave markers, while their hanging format turns them into a seasonal wall decoration.
The repeated tombstone shape keeps the idea manageable, and each marker can be given a different outline or symbol to make the set feel varied. Use a smaller number of pieces for a short garland, or adapt one tombstone into a standalone hanging ornament with a painted name or simple carved-looking detail.
Bloodshot Eyeball Clay Magnets

These hand-sculpted clay eyeballs turn a familiar Halloween prop into small, graphic wall decorations. Their rounded white forms, raised red veins, and brightly colored irises make the design easy to recognize, while the green, purple, and blue eyes give each magnet its own look.
The simple spherical shape makes the idea easy to adapt: use fewer veins for a simpler version, or change the iris colors and make a matching set. They work as playful seasonal magnets, and the same eyeball design could be made larger as a decorative sculpture or adapted into a hanging ornament.
Owl Perched Beneath a Crescent Moon

This hand-sculpted clay figurine pairs a textured owl with a raised crescent moon for a simple moonlit-night scene. Its rounded body, layered feather details, bright eyes, and warm brown and gold colors make it a distinctive miniature sculpture and seasonal decoration.
The owl-and-moon arrangement is easy to adapt without losing the main idea: simplify the feathers into a few marks, or change the colors to black and silver for a more Halloween-focused look. Make the figurine larger as a shelf decoration, or create a smaller version with fewer details for a compact collectible.
Miniature Clay Witch in a Moonlit Forest

A hand-sculpted miniature scene places a small dark-cloaked figure among pine trees, rocks, and patches of greenery, with a textured full moon suspended above. The rounded base gives the scene a compact, woodland setting, while the layered tree shapes and muted colors make it read as a spooky seasonal sculpture.
The small scale helps keep the idea focused on a few clear details: a simple figure, evergreen silhouettes, and a moon. You could simplify it by using fewer trees and leaving out some of the ground textures, or adapt the scene with bare branches, tiny pumpkins, or a different moon shape; making a few variations would also suit a Halloween miniature display or a handmade gift.
Frequently Asked Questions
Air-dry clay is a convenient choice because it needs no oven and is easy to shape by hand. Polymer clay is a good option for small, sturdy figures with fine details, but it must be baked according to the package instructions. For either type, choose a clay that stays workable long enough for you to add faces, clothing, and accessories.
You can start with clay, a clean work surface, and a few simple shaping tools. A toothpick, blunt craft knife, or sculpting tool helps add eyes, mouths, folds, and other details. You may also want acrylic paint, small brushes, and a suitable sealant. Always check that paints and finishes are compatible with your clay.
Work with small amounts of clay and build the figure from basic shapes, such as spheres, cones, and short cylinders. Keep details simple and slightly exaggerated so they remain visible at miniature scale. Add features with a toothpick or sculpting tool, and let the clay firm up a little if it feels too soft to handle neatly.
Give each figure a broad, flat base, or attach it to a small clay platform before the clay dries or is baked. Keep the character’s heaviest parts close to the base, and avoid making heads or accessories too large. For particularly top-heavy designs, a wire support may help, but only use materials and methods suitable for your clay type.
Follow the instructions for your specific clay. Air-dry clay typically needs to dry completely before painting or sealing, while polymer clay must be baked at the temperature and for the time listed on its packaging. Once finished, store figures in a dry, padded container away from heat and direct sunlight. Handle delicate details gently, especially on small characters.
