


I like how a simple stamped pattern can give a small clay project a little extra character.
For these ideas, I’ve gathered cute pieces that use texture in different ways, from decorative accents to small handmade objects.
Some patterns are subtle, while others make the clay itself the main feature.
I hope these projects give you a few fresh ideas to try with your own shapes, colors, and stamps.
Blue Cloud-Shaped Clay Trinket Dish

A hand-shaped clay trinket dish with a soft blue finish turns a simple cloud silhouette into a small decorative catchall. Its uneven, scalloped edges and stamped-looking surface texture frame the closed-eye details, while the shallow center holds small items such as rings.
The cloud outline makes the design easy to adapt: keep the face for a playful look, or leave it plain and vary the texture or color. A smaller version could hold earrings, while a larger one could be used for other lightweight keepsakes; the same idea could also be shaped as a star or flower dish.
Textured Clay Animal Face Decorations

These hand-sculpted clay animal faces combine a fox, rabbit, and raccoon into a set of small decorative pieces. Rounded face shapes, attached ears, contrasting clay colors, and dotted impressions create recognizable features without needing elaborate detail. They fit the miniature animal craft category and could be displayed as decorative plaques or adapted into ornaments.
The stamped marks give each face texture while helping define the fur, whiskers, and inner ears, so the same design can be varied with different animal markings or colors. For a simpler version, use one face shape and fewer impressions, then add just the ears, eyes, and nose; making the pieces larger or smaller can also change how they work as decorations or handmade gifts.
Stamped Clay Disc Wall Hanging

This handmade clay wall decoration uses a vertical string of round discs as a small hanging display. A pressed fern, tiny flower motifs, and a crosshatched texture give each ochre, terracotta, and muted green disc a different stamped surface while keeping the set visually cohesive.
The repeated circular shapes make the idea easy to adapt into a shorter or longer wall hanging, or into individual ornaments. You could simplify the stamps to one leaf or flower design and change the colors to suit a room or season, making the discs a useful project to save for a handmade gift or decorative display.
Mushroom House With a Sleeping Hedgehog

This hand-sculpted clay miniature pairs a mushroom-shaped cottage with a resting hedgehog, making it a small decorative scene rather than a functional house. The broad red cap, cream spots, textured walls, and brown door give the cottage a clear silhouette, while the hedgehog’s layered spines add a contrasting surface detail.
The mushroom roof and simple cottage features make the scene easy to adapt to different colors, window shapes, or garden details, and the hedgehog could be replaced with another small clay animal. A simplified version could use a plain textured body and fewer details, while a larger one could add more plants and stones around the base. Its compact, recognizable setup makes it a useful miniature sculpture idea to save or give as a handmade gift.
Textured Clay Coasters in Coastal Colors
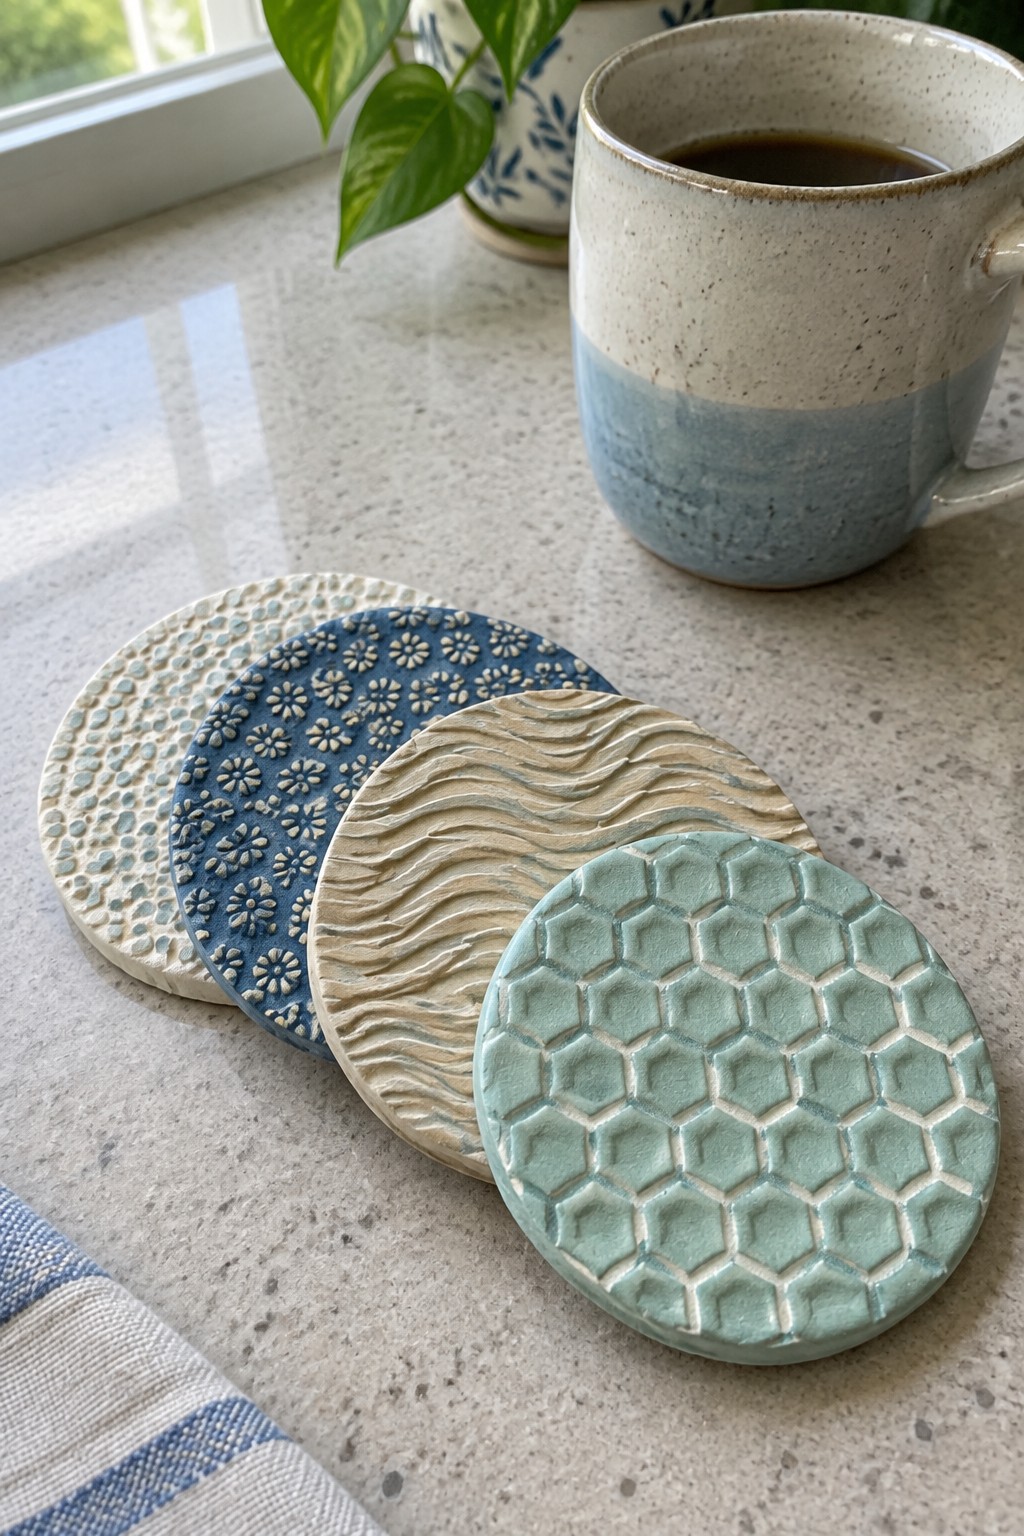
These handmade clay coasters pair raised stamped patterns with rounded disc shapes, including a honeycomb design, wavy lines, and small floral motifs. Muted aqua, cream, and navy give the set a coordinated look while keeping each coaster’s texture distinct, making this a functional decorative clay accessory.
The repeating shapes make the designs easy to adapt across a matching set, and simpler patterns can be pressed into the clay for a less detailed version. Try different color combinations or vary the motifs to suit a room, or make a single disc as a small decorative accent; coasters should be kept decorative unless their material and finish are confirmed suitable for use with drinks.
Layered Clay Leaf Earrings

These handmade clay earrings use overlapping leaf shapes to create a dimensional botanical jewelry design. The muted green leaves sit against rust-orange outlines, while the incised veins add stamped-texture detail to each small hanging charm.
The layered silhouette makes the earrings easy to adapt with different leaf shapes, seasonal colors, or simpler vein marks. You could also use the same motif for a pendant or decorative charm, or make a single leaf layer for a more beginner-friendly version.
Sun-Shaped Clay Ring Dish

A hand-sculpted clay trinket dish uses a shallow round center and pointed sun rays to create a bright place to keep rings. Its warm yellow color and irregular handmade edges make the sun motif clear, while the stamped lines across the interior add texture to this decorative jewelry holder.
The simple round base gives the design a straightforward shape to adapt, and the rays can be made shorter or more widely spaced for a different look. Try other sunny colors or add stamped patterns to the center, keeping in mind that this dish is best suited to holding small accessories rather than serving food.
Smiling Croissant Clay Keychain

A miniature hand-sculpted croissant becomes a playful clay charm for a key ring. Its curved, layered shape and ridged pastry texture make the form easy to recognize, while the tiny face and pink cheeks add a simple focal point. The golden-brown color keeps the charm close to its pastry inspiration.
The small scale makes this idea easy to adapt into other miniature food charms, such as a baguette, pretzel, or cinnamon roll. You could simplify the face to two dots and a curved line, or change the colors and expression to give each charm a distinct look. It’s a practical project to save for a handmade keychain or a small gift.
Textured Clay Garden Markers
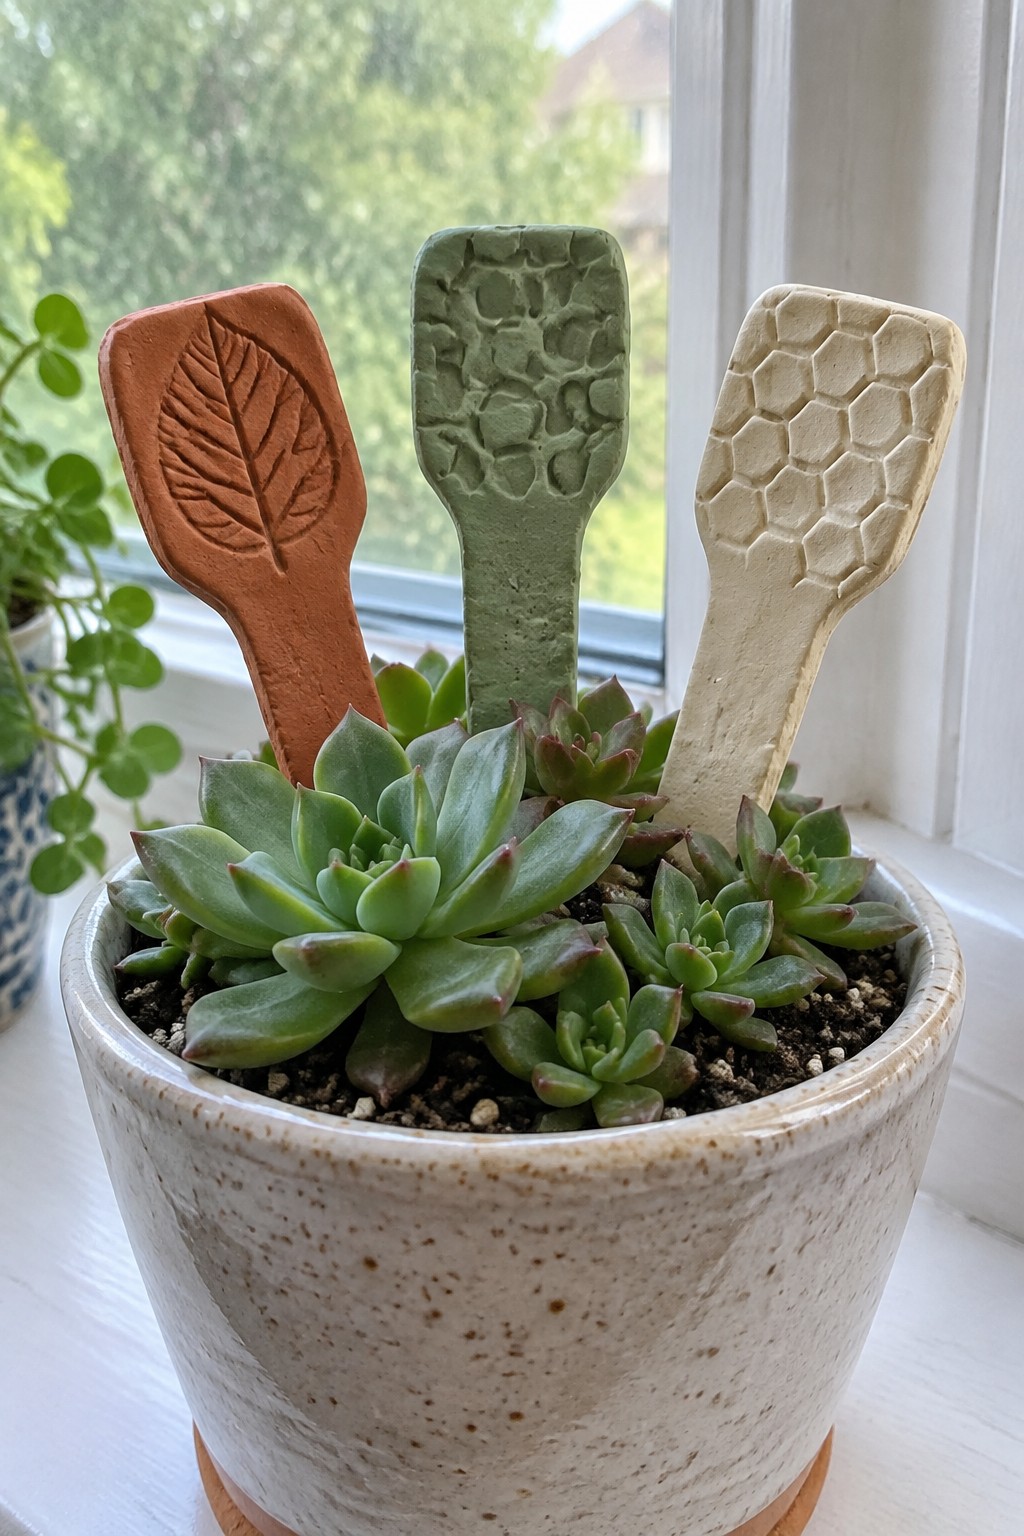
These handmade clay garden markers use broad paddle shapes as a canvas for raised and impressed patterns, including a leaf, irregular stone-like forms, and a honeycomb design. Their earthy colors and tactile surfaces make them decorative plant labels that fit into a succulent arrangement without relying on painted lettering.
The different patterns make each marker easy to distinguish, and the same idea could be adapted with simple leaf veins, dots, or geometric shapes for an easier version. Vary the colors and marker shapes to suit different plants, or make a matching set for a windowsill garden or as a gift; keep them decorative unless the clay and finish are suitable for outdoor use.
Pastel Clay Miniature Bakery Treats

A set of tiny clay pastries turns familiar bakery treats into a colorful miniature sculpture collection. The stacked lavender and mint macarons, pink flower-decorated doughnut, and cream-filled pastry use rounded shapes and small details to make each piece distinct.
The mix of simple pastry forms and decorative accents gives you several designs to adapt, from changing the icing colors to adding different flowers or tiny fruit details. Make one treat as a small collectible or create a matching set, simplifying the decorations to a few raised details if you want to focus on the basic shapes first.
Floral Clay Heart Ornaments

These hand-shaped clay hearts are hanging ornaments decorated with painted flower stems and small raised details. The dusty rose, muted blue-green, and cream colors keep the botanical designs distinct while giving the set a coordinated look, and the stamped or carved-looking floral textures add detail without covering the heart shapes.
The simple silhouette makes the idea easy to adapt into different sizes or a single ornament, while beginners could use a basic flower-and-stem design instead of adding several detailed blooms. Try changing the colors or floral motifs to suit a season, or make a matching set for a decorative wall display or handmade gift.
Textured Clay Cat Figurine

A hand-sculpted clay cat figurine uses a rounded body, small attached paws, and simple dark facial features to create a compact animal sculpture. Pressed marks across its belly and sides add stamped texture, while the muted gray-brown color keeps the sculpted details easy to notice.
The repeated impressions give the cat surface interest without requiring painted patterns, and the basic rounded shape could be adapted into other animals by changing the ears, face, or body markings. For a simpler version, make fewer texture marks and keep the facial features minimal; a larger cat could also be personalized with different colors or a small sculpted accessory.
Stacked Clay Sculpture With Stamped Textures
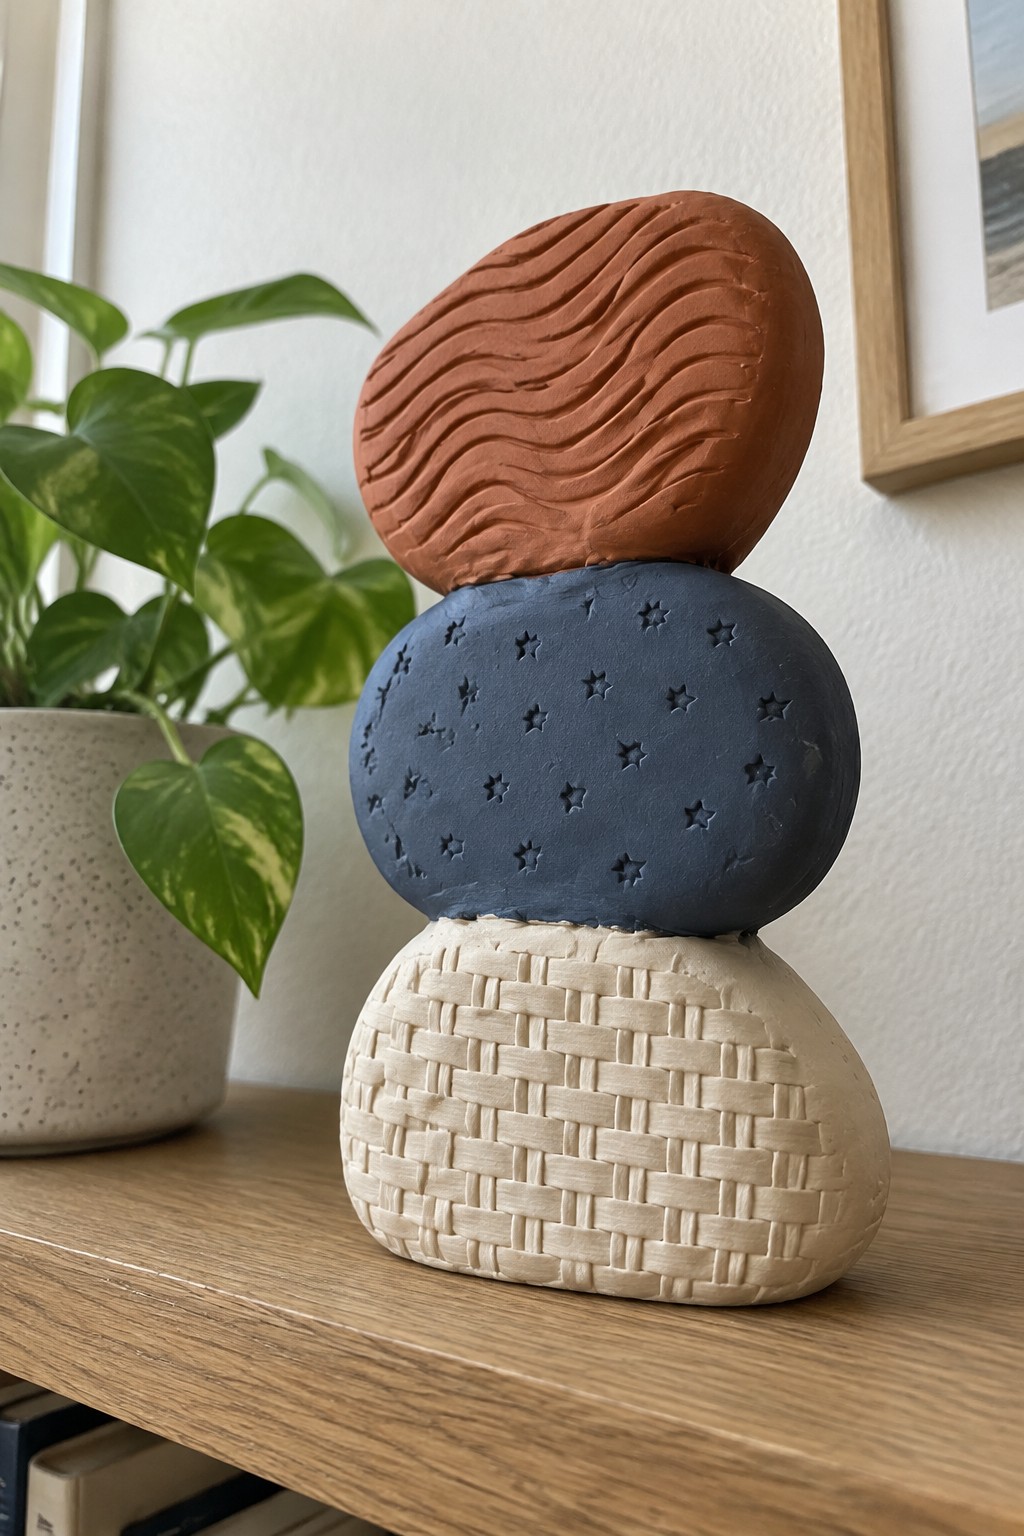
This hand-sculpted clay sculpture stacks three rounded forms, each decorated with a different texture: flowing grooves, small star impressions, and a woven pattern. The contrast between terracotta, slate blue, and cream gives the decorative figurine clear visual layers without needing painted details.
The stacked shape makes this idea easy to adapt into a smaller desk sculpture or a taller decorative piece by changing the size or number of forms. For a simpler version, use two shapes and focus on one texture, or swap the stars for dots, leaves, or another repeated stamped motif.
Colorful Textured Clay Bead Necklace
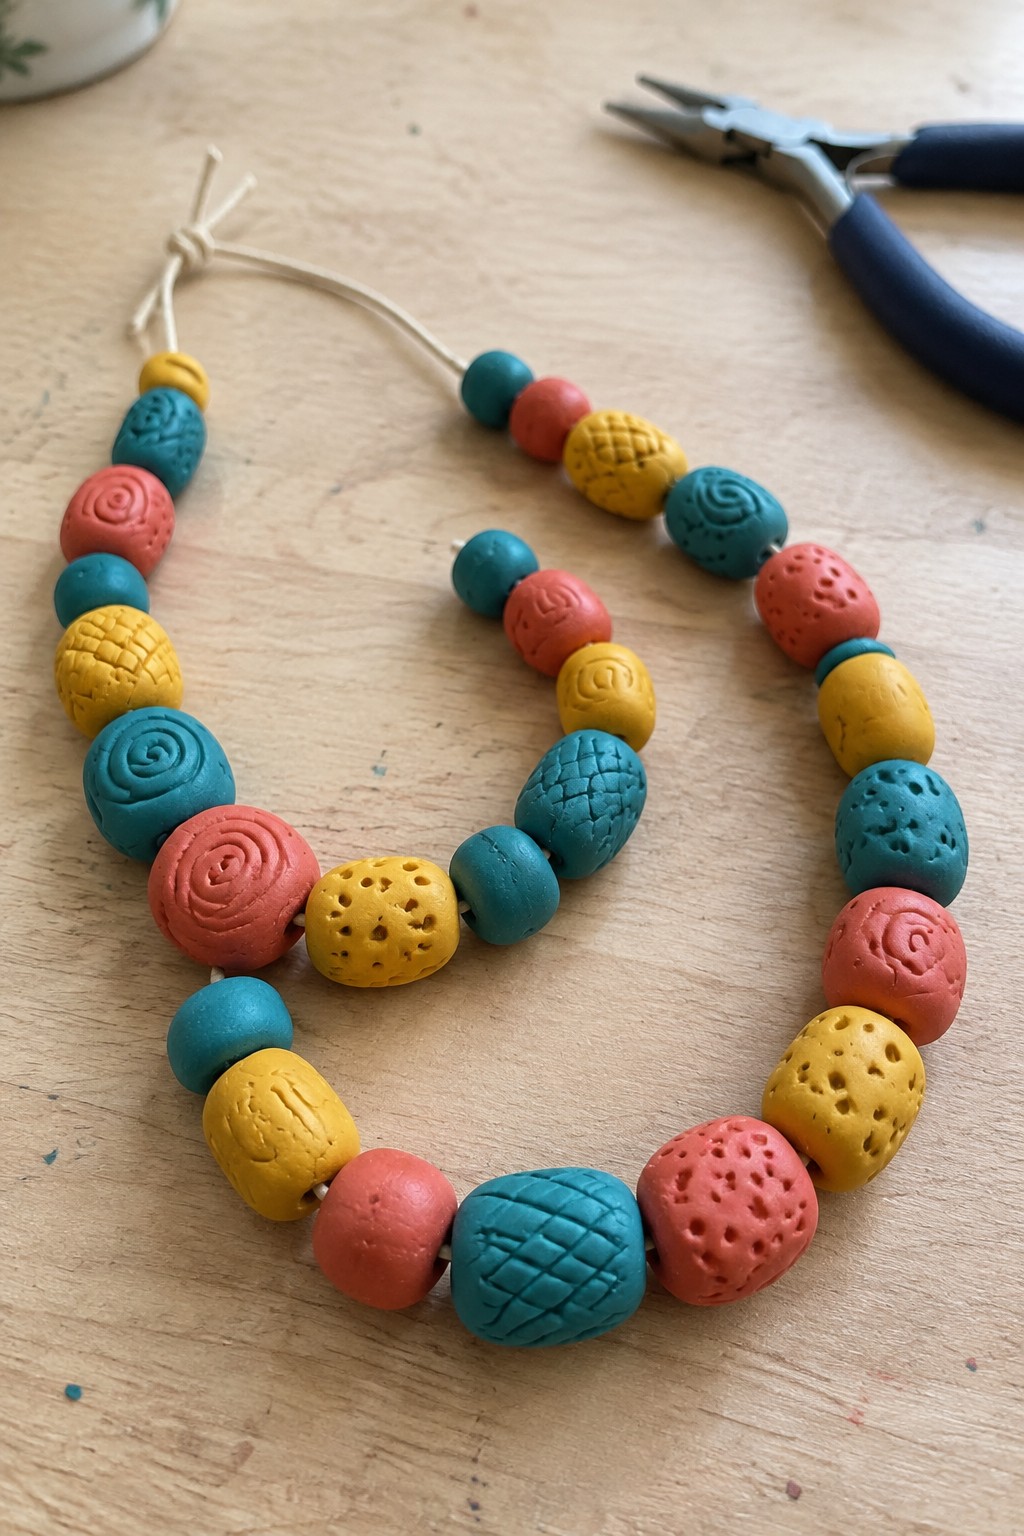
This handmade clay necklace uses rounded beads in teal, coral, and yellow, with stamped and carved patterns that give each bead its own surface detail. The alternating colors and varied bead sizes make it a bold piece of wearable clay jewelry rather than a uniform strand.
The repeating color palette ties the different textures together, while the larger beads make the design easy to adapt with fewer pieces or a shorter strand. You could simplify it by using one pattern across several beads, or try a different three-color combination to make a matching bracelet or necklace set.
Autumn Clay Pumpkin, Acorn, and Leaf Decorations
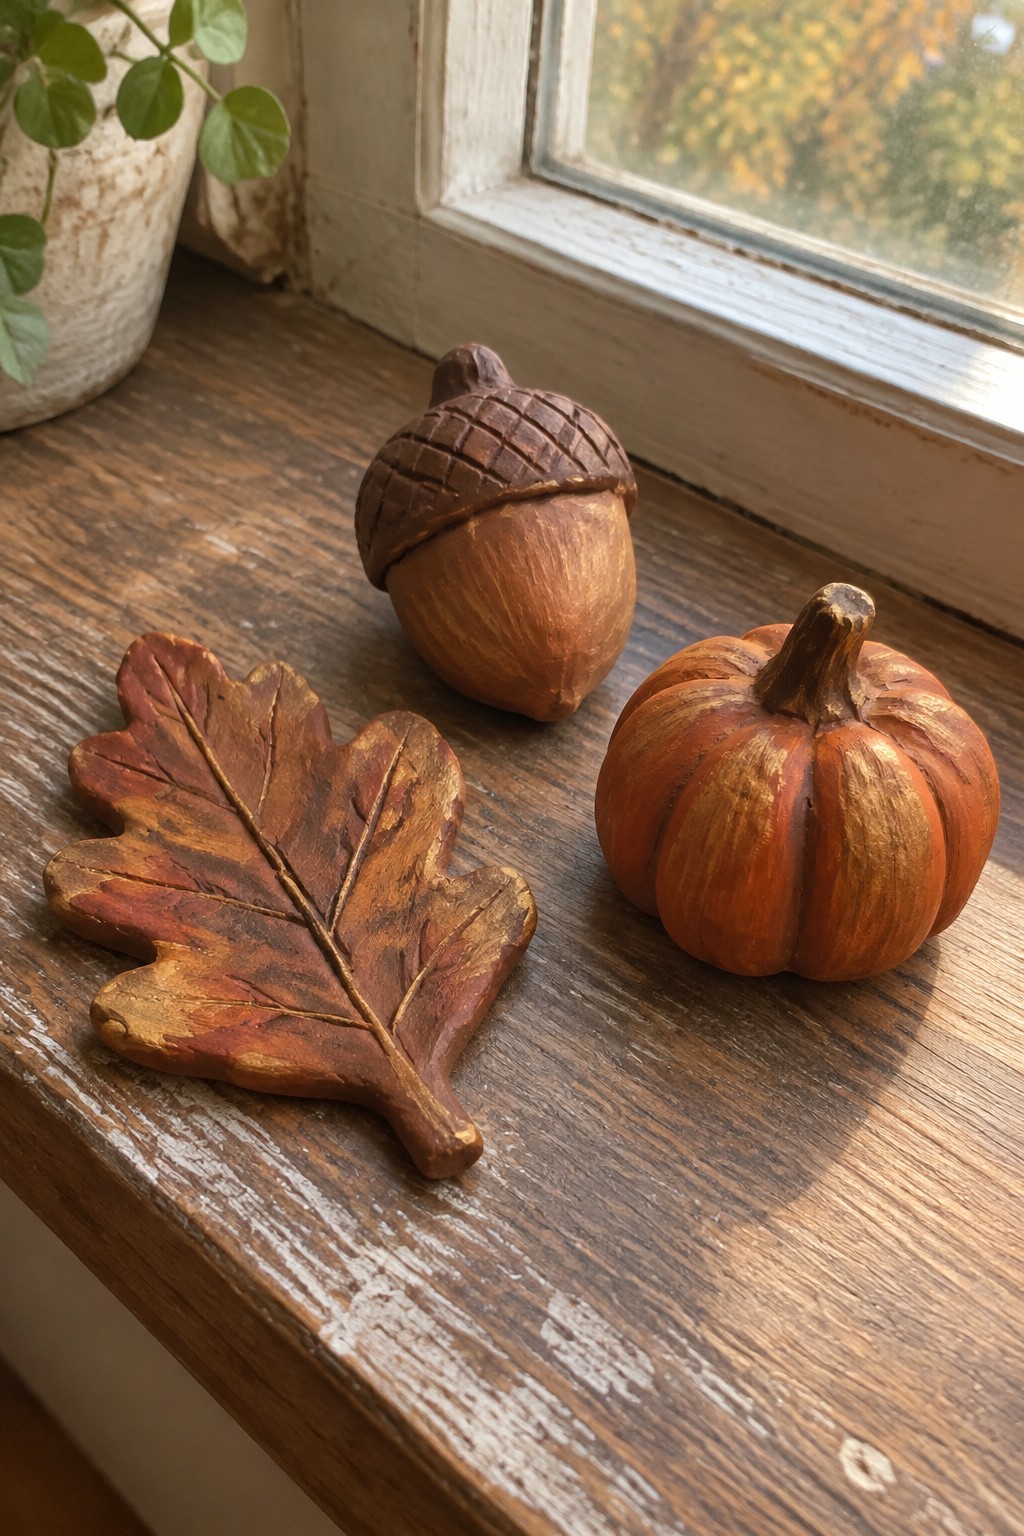
Hand-sculpted autumn decorations bring together a rounded pumpkin, a large acorn, and a broad leaf, each finished in warm brown and orange tones. Their carved grooves and raised textures give the small seasonal sculptures distinct shapes, making this a coordinated clay decoration set rather than a functional household item.
The simple silhouettes make the set easy to adapt: change the leaf shape, vary the pumpkin’s ridges, or add different colors to the acorn cap. You could make just one larger piece or create smaller versions to arrange together on a seasonal display.
Crescent Moon Clay Photo Holder
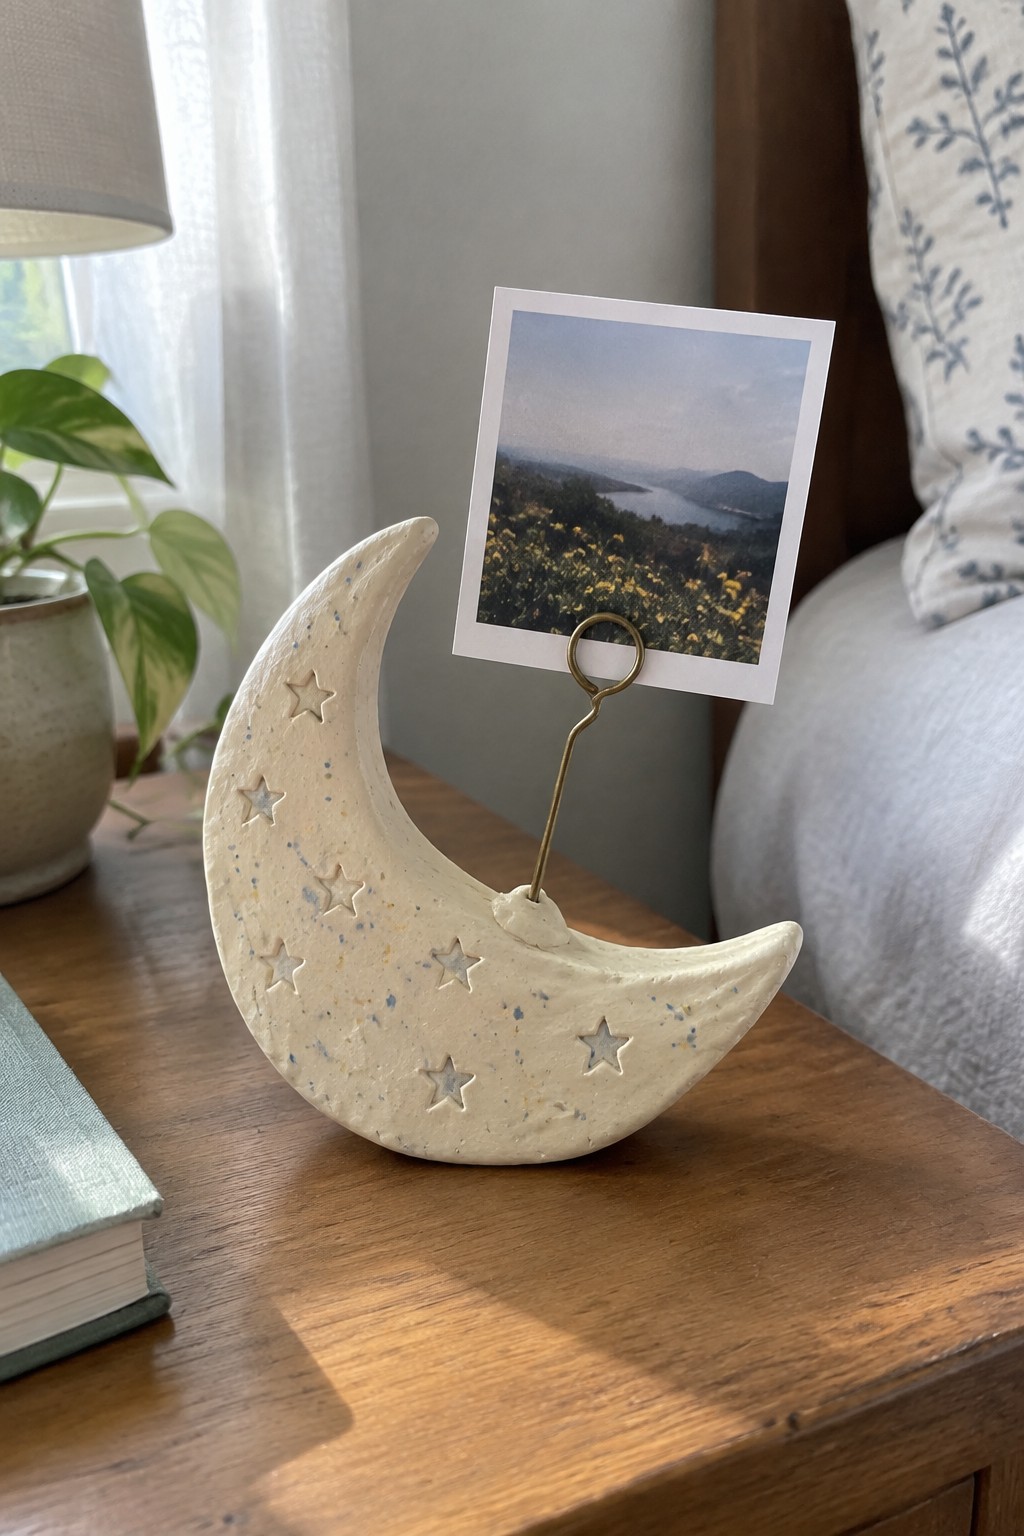
A hand-sculpted crescent moon becomes a decorative photo holder, with star-shaped cutouts and a wire clip supporting a small picture. Its cream-colored surface and scattered blue and yellow flecks add detail without taking attention away from the curved silhouette, making it a clay display accessory rather than a simple sculpture.
The moon shape can be resized for a small desk photo or a larger print, and the star cutouts could be replaced with dots, hearts, or other simple motifs. For a simpler version, use a plain crescent and add just a few stamped or pressed details; changing the clay color or the picture makes the holder easy to adapt as a handmade gift or tabletop decoration.
Frequently Asked Questions
You’ll need clay, texture stamps or textured objects, a rolling pin, a smooth work surface, and basic cutting tools. Air-dry clay is convenient for projects you can finish at home, while polymer clay is baked in an oven according to its package instructions. For stamps, try rubber stamps, lace, leaves, shells, buttons, or other objects with an interesting surface. Keep a little water nearby for smoothing air-dry clay, and use a damp cloth to clean tools between impressions.
Roll the clay to an even thickness, then press the stamp straight down with steady pressure. Avoid rocking it, which can distort the pattern. If the stamp sticks, lightly dust it with cornstarch or use a small amount of water, depending on the clay and stamp material. Test your technique on a scrap piece first, and try pressing with a flat board or the bottom of a book to distribute pressure evenly.
The best clay depends on how you want to finish your project. Air-dry clay works well for ornaments, wall hangings, small dishes, and decorative charms, and it does not require an oven. Polymer clay is a good choice for smaller, durable pieces such as earrings, magnets, and miniature decorations, but it must be baked as directed. Check the clay’s packaging before making functional items, since many craft clays are not food-safe or suitable for holding hot objects.
Let the clay dry or bake fully before adding color. To highlight raised details, lightly brush paint across the surface so it catches the high points, or dab a darker wash into the recessed areas and wipe away the excess. You can also color the clay before stamping, use metallic paint on selected details, or leave parts of the design natural for contrast. Apply thin layers so paint does not fill in the texture, and seal the finished piece only with a product compatible with your clay.
Start with simple shapes and designs that don’t require precise cutting or joining. Try stamped gift tags, hanging ornaments, mini wall plaques, plant markers, fridge magnets, jewelry charms, or small decorative hearts. Roll out the clay, stamp a repeating pattern, cut out the shape, and add a hole for hanging before the clay dries or bakes. For a more personalized touch, combine textures with initials, short words, or a stamped border.
